
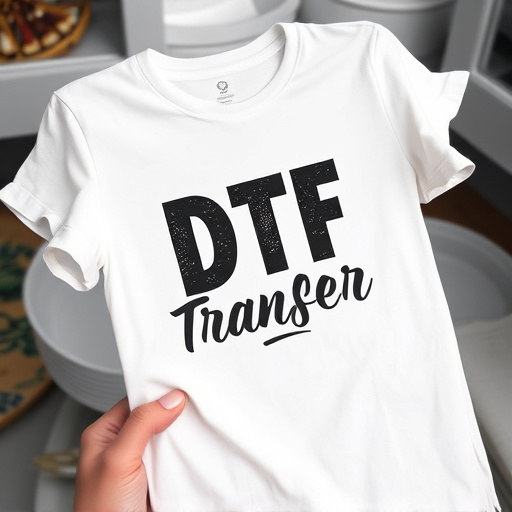


Direct-to-film (DTF) printing is a cutting-edge technology offering high-quality, durable prints on diverse materials like fabric, paper, and plastics. It eliminates traditional steps, ensuring vibrant colors and sharp details suitable for apparel, signage, and 3D printing. Preparing designs involves optimizing them for DTF methods and converting to vector formats like SVG or EPS. Workspace setup requires a dedicated, well-lit area with high-quality printers, proper ventilation, and essential tools. Creating DTF transfers involves applying ink precisely, curing it, and removing the transfer film. Post-application, curing, cleaning, and maintaining equipment are crucial for optimal results. Challenges can be overcome by meticulous surface preparation, extensive testing, and consistent printing practices.
Discover the art of direct-to-film (DTF) printing with this comprehensive guide. Learn how to transform your designs into vibrant, durable prints on various materials. From understanding the DTF process to mastering the transfer technique, we’ll walk you through each step. Prepare your design, set up your workspace, and explore tips for a successful DTF transfer. By following these instructions, you’ll soon be creating high-quality, custom prints with ease. Uncover the secrets to achieving perfect DTF results every time!
- Understanding Direct-to-Film (DTF) Prints: A Basic Overview
- Preparing Your Design for the DTF Transfer Process
- Setting Up Your Equipment and Workspace
- Applying the DTF Ink and Transferring the Design
- Post-Transfer Curing and Cleaning Procedures
- Tips and Troubleshooting Common Issues with DTF Transfers
Understanding Direct-to-Film (DTF) Prints: A Basic Overview
Direct-to-film (DTF) printing is a cutting-edge method for creating high-quality, long-lasting prints directly on various materials, including fabric, paper, and plastics. This innovative process eliminates the need for intermediate steps, such as film positives or plates, making it a game-changer for many industries. With DTF transfers, you can achieve vibrant colors, sharp details, and exceptional durability, ensuring your designs pop and last.
The DTF transfer process involves using specialized printing technology to apply ink directly onto the target surface. This ink is then cured, or set, using heat or UV light, resulting in a permanent bond. The beauty of DTF lies in its versatility; it can be used on a wide array of materials, allowing for creative applications in apparel, signage, and even 3D printing. Whether you’re personalizing merchandise, creating promotional items, or designing artistic pieces, understanding the fundamentals of DTF printing is the first step toward unlocking its immense potential.
Preparing Your Design for the DTF Transfer Process
Before you begin the DTF transfer process, preparing your design is a crucial step that ensures optimal results. Start by ensuring your graphic or image is high-resolution and has the correct dimensions for the final printed product. Any pixelation or low resolution can result in a poor-quality print. Use editing software to adjust the design as needed, making sure it meets the specific requirements of the DTF method.
Next, convert your design into a suitable file format, typically a vector graphic like SVG or EPS. Vector formats allow for precise scaling without losing quality. Save your file with a transparent background to avoid any visible artifacts during the transfer process. This preparation stage is essential to creating a flawless direct-to-film print, ensuring the final product matches your design vision.
Setting Up Your Equipment and Workspace

Setting up your workspace and gathering the right equipment is a crucial step in achieving high-quality direct-to-film (DTF) transfers. Begin by clearing a dedicated area, ensuring it’s clean and well-lit to facilitate precise work. Invest in a good quality DTF printer, as this will be the heart of your setup. Ensure it’s placed on a sturdy surface to prevent any movement during printing.
Next, organize your materials: gather transparent transfer sheets compatible with your DTF printer, along with inkjet or laser printers for design creation. A smooth, flat workbench or table is ideal for positioning your prints and ensuring alignment. Additionally, have at hand a set of precision tools like pin tools or spatulas to apply the transfers without bubbles or wrinkles. Lastly, consider proper ventilation as some printing processes may involve fumes.
Applying the DTF Ink and Transferring the Design

Applying the DTF Ink is the first crucial step in the process. Ensure your surface is clean and dry, then carefully dispense the ink onto the designated area using a precision tool or a dropper. Spread the ink evenly across the surface, following any manufacturer guidelines for optimal coverage. Once applied, allow the ink to dry completely before proceeding. This step ensures a smooth transfer of the design later.
After the ink is set, it’s time to prepare for transferring your design. Place the DTF transfer film overlaying the inked surface, aligning it carefully. Apply pressure with a warm iron or a press, following the recommended temperature and time guidelines provided by the DTF transfer kit manufacturer. This process bonds the ink to the substrate permanently. Remove the transfer film gently, revealing your completed DTF design.
Post-Transfer Curing and Cleaning Procedures

After applying the DTF transfer, proper curing and cleaning procedures are essential for achieving optimal print quality. Allow the transferred image to sit undisturbed for a period recommended by the manufacturer, typically ranging from 24 hours to a few days, depending on the ink and substrate combination. During this time, the inks will fully cure and adhere to the surface, ensuring long-lasting durability.
Once curing is complete, gently clean the printed item using warm water and a mild detergent. Avoid harsh chemicals or abrasive cleaning methods that could damage the delicate print. Rinse thoroughly with clean water and dry completely with a soft cloth or paper towel. This gentle cleaning process helps remove any residual ink or moisture, preserving the vibrancy and integrity of the direct-to-film print.
Tips and Troubleshooting Common Issues with DTF Transfers

Direct-to-film (DTF) transfers can be a game-changer for creating custom designs on various surfaces, but they’re not without their challenges. Here are some tips and tricks to help navigate common issues:
When setting up your DTF transfer, ensure your surface is clean, dry, and free from any debris or oils. The quality of the final print heavily relies on a smooth and prepared substrate. Consider using a lightly sandy paper to roughen the surface slightly, improving ink adhesion. Always test your setup first; printing on different materials may require adjustments to pressure, temperature, and ink settings. Common issues include poor ink transfer, bubbles, or smudges, which can be addressed by maintaining a consistent printing speed, using high-quality printheads, and applying even pressure during the press. Regularly cleaning your equipment and ensuring proper maintenance is key to avoiding problems.